Do Japanese People Fold Their Money

Do Japanese People Fold Their Money

Japanese wood sulfur copper ore swords and folding fans were traded for Chinese silk porcelain books and coins in what the Chinese considered tribute but the Japanese saw as profitable trade. Men should keep their hands down and straight at their sides while women usually keep their hands folded in front of them.

Do Japanese People Fold Their Money
Japanese Money Envelope Shugi Bukuro Money Envelopes Japanese Wedding Japanese

Punctuality is a must in all business and social meetings.

Do japanese people fold their money. First practical issues concerning family and money played a large role in their. It may never even cross their mind to question their loyalty to the company. Move your upper body downwards and bow to a 45-degree angle.

A card and a cake will be sufficient and there are many special and affordable things to do that will make your partners birthday will be an unforgettable one. 1give her all your money 2dont answer back 3give her some more money 4let her sleep around 5buy her bling with even more money 6dont get too close except when shes in a narcissistic feed heat-frenzy 7enable her manga world fantasy life 8sell your parents to the knackery to buy more bling 9dont enjoy yourself 10find. If you ask a Japanese person to do something and they tilt their head away from you its a sign of strong relunctance or a polite refusal.

Unlike in America for example where gifts such as household items are common in Japan it is much more common to give a gift of money. Never point at someone with four fingers spread out and thumb folded in. If no tray is present use both hands when giving and receiving money.

What kinds of gifts do people receive in Japan when they get married. Japanese blogger Madame Riri recently posted an article exploring this issue by sharing the stories of men who were asked to described the reasons they divorced their Japanese wives. Moreover an aversion to risk similarly appears rational in the wake of Japans traumatic.

Kakeibo pronounced kah-keh-boh translates as household financial ledger. Thats because if they were negative then people would simply take most of their money out of the bank and the banking system would collapse. The standard Japanese bow starts with a straight posture.

On the surface this seems like a rational choice in an economy experiencing persistent deflation. Invented in 1904 by a woman named Hani Motoko notable for being Japans first female journalist kakeibo. In 1401 he restarted the tribute system describing himself in a letter to the Chinese Emperor as Your subject the King of Japan.

Lets take a look at some of those reasons. I did three years of Japanese in school and the chopsticks in rice was definitely one we learned as was the wearing of shoes in someone. The amount can vary – from 10000 to 50000 yen.

If you pay place your money on the small tray provided rather than handing it to the server or register attendant. Japanese may exchange business cards even before they shake hands or bow. Japanese residences have thin walls and poor insulation – dont blast your stereo or television.

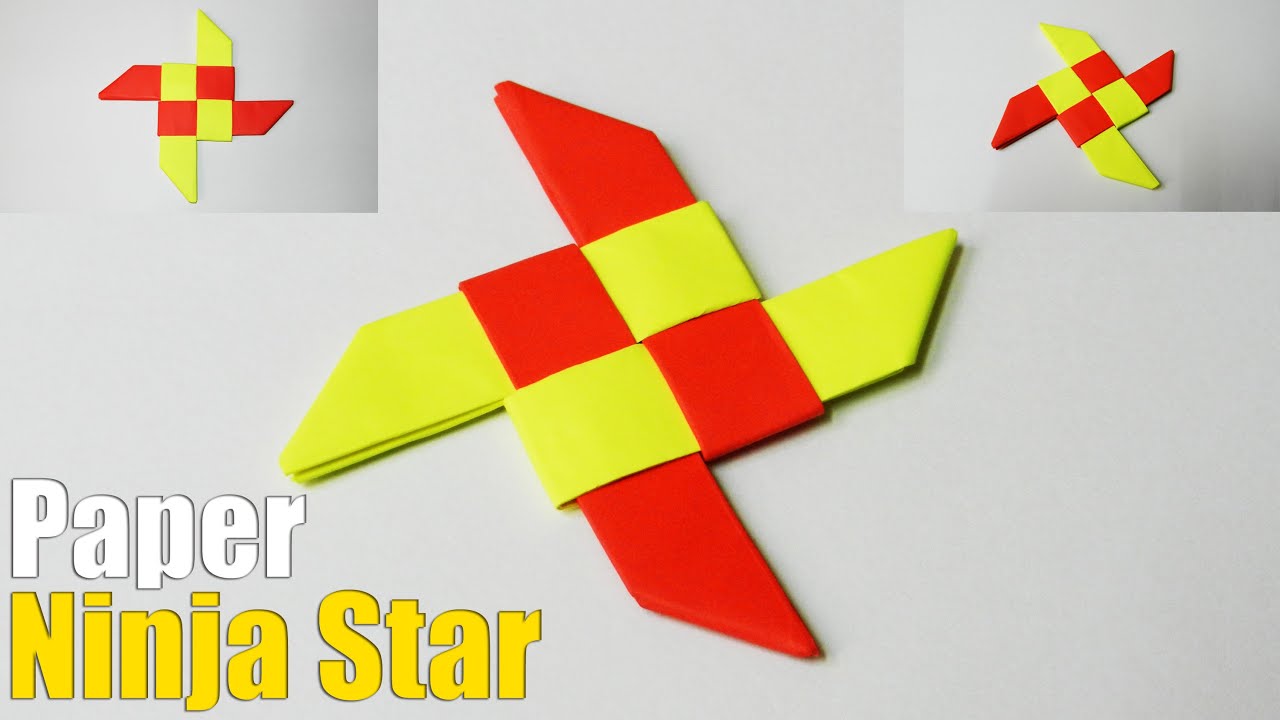
Top 10 things that all guys can do to make their j-girl happy. Not as a general rule no. In Japan you start number one by folding your thumb into your open hand.

Of the kōden-bukuro the folded end at the bottom should be placed under the top fold as the opposite or the bottom fold over the top one suggests that bad luck will become a series of misfortunes. That means the average saver can literally be paying to put their money in a bank depending on how much they shell out in fees for withdrawals and transfers but get almost no interest. As consistent with the rest of their respectful culture Japanese people are also very well-mannered when it comes to the handling and care of money.

The index finger comes next then the middle finger and so on until youve got a fist. In his research Miura found that Japans 1 percent does indeed tend to avoid ostentation. Sticking chopsticks upright in rice really bad Mishandling someones business card dont put it in back pocket or fold it Wearing your shoes into someones home.

Tipping in Japan is not common and is often considered rude — dont worry about leaving something extra. Any degree of knowledge of Japanese culture is greatly appreciated. Japanese people often speak of loving their company and being proud to work there.

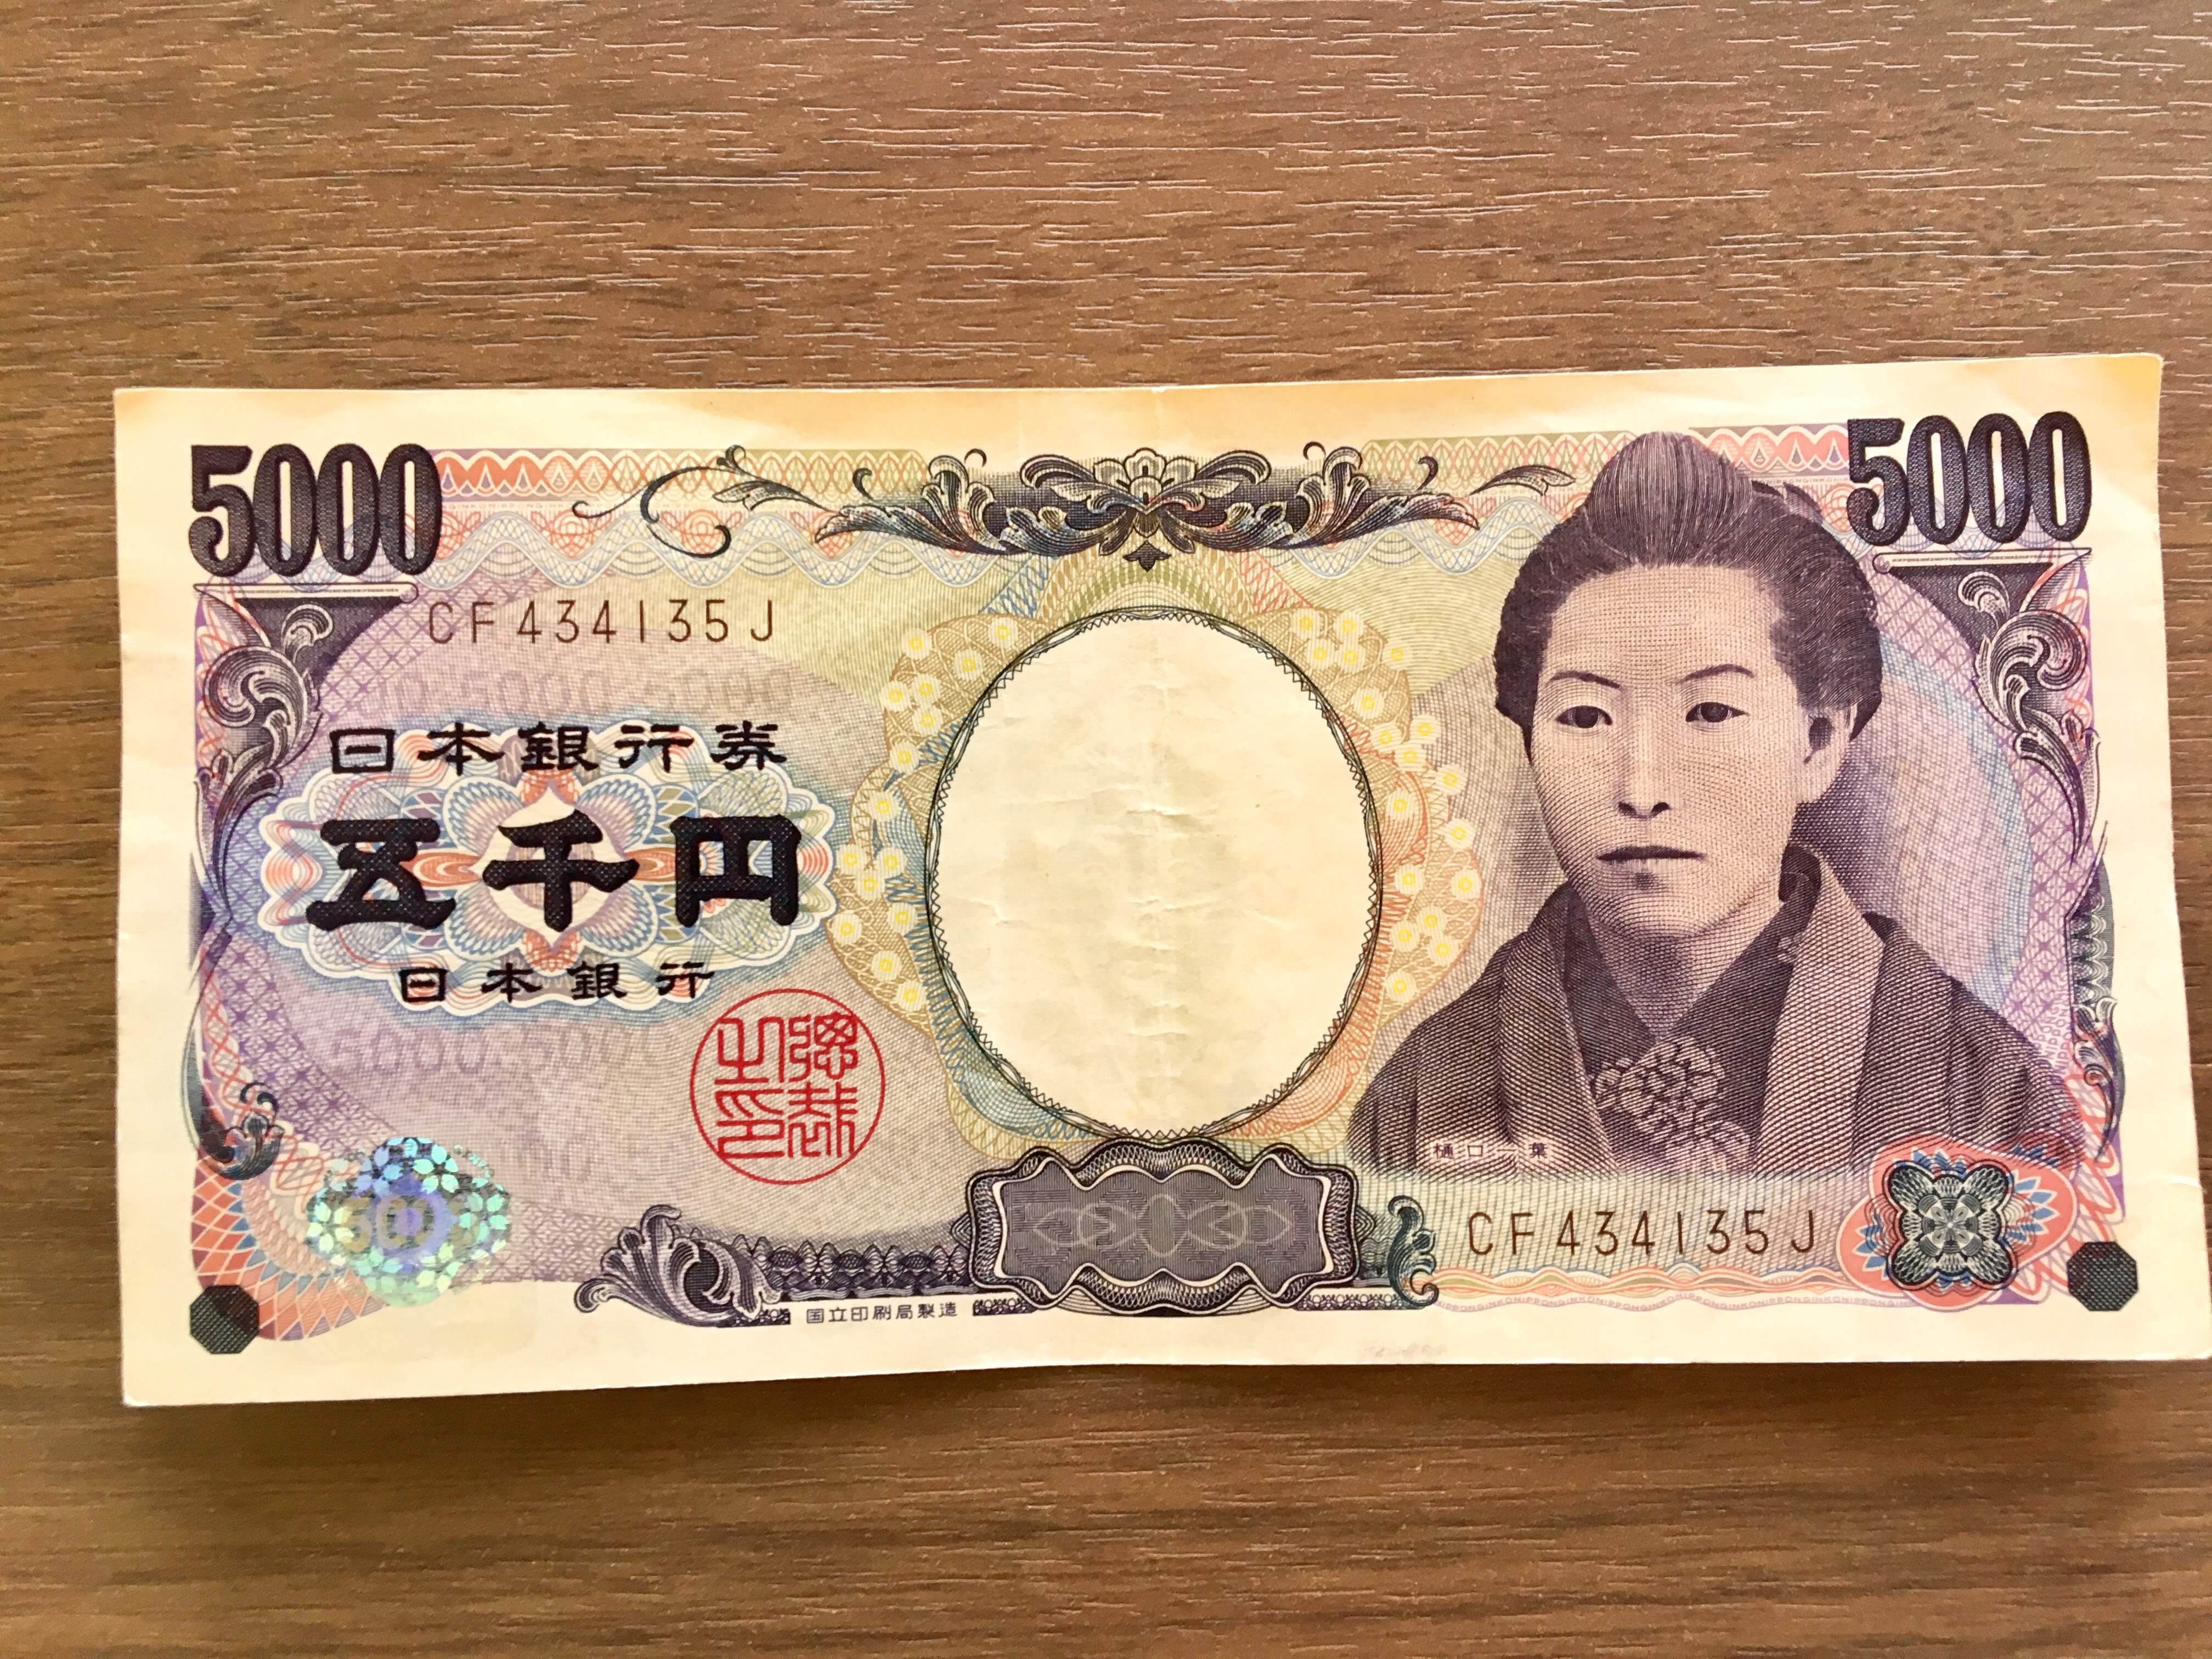
Unlike in some Western countries where it is perfectly normal to stuff a wad of bills into your pocket or wallet in Japan it is frowned upon to fold or crumple money. Japanese households are well known for their preference for cash 1 which represents the majority of their financial assets. The Japanese gesture for no is fanning your hand sideways a few times in front of your face.

Its true that the Japanese treat their currency with visibly more respect than lets say the Germans we are comparably horrible with that. Japan is a relatively safe country and people are used to having large amounts of cash on hand. However dont feel the need to spend a fortune if you are dating a Japanese person and their birthday is coming up.

People attending a Japanese funeral bring money called kōden either in special funeral offering envelopes kōden-bukuro or small plain white envelopes. Low productivity Many people pointed out the low productivity of Japanese companies. But even then its not like folding money would be something outrageous in Japan.

They dont build mansions were talking real mansions not condos and believe it unseemly to throw.

Read more

Easy Way To Fold A Paper Into Thirds

Easy Way To Fold A Paper Into Thirds

Turn the paper and fold it into thirds again so that you get 9 squares. This method requires having two squares of paper.

Easy Way To Fold A Paper Into Thirds
Wrinkle On Paper August 2015 Origami Paper Folding Paper Paper Games

Fold the top straight edge down the meet the fold you just created.

Easy way to fold a paper into thirds. Angle your paper so the two corners span the number of division you want. Then by Pythagoras theorem we know that. If you want to fold your sheet into thirds angle the yellow paper so it spans over 6 segments of the purple template.

To start take a square piece of paper and mark half way along top side with a small crease. Use either a grid on your cutting mat or just a sheet of lined paper. This technique can be applied to folding any rectangular piece of paper into thirds.

So which prime numbers multiplied together produce 12. At this point you may like to secure the two pieces of paper together with masking tape. Where the line crosses the lower sheet is your one-third mark shown at the green arrows Make your fold exactly at that point and it will divide the sheet evenly in thirds.

The problem is that dividing the paper into thirds is not as simple as dividing the paper in half. Use care when finding the center point and be sure to locate your straight edge very precisely. You have just folded your paper into 3rds.

It is fairly easy they are two another two and three. Fold one side over at what looks to be 13 but only pinch one edge of the paper not the entire width then unfold. So we have to divide the paper into thirds then every third in half and then in half again.

Fold the square in half along the diagonal by folding one corner to the opposite corner. You will need to show the. Fold the bottom-left corner to meet the pinch-crease made above join the two dots.

Fold the paper from the bottom so that the distance from the fold to the top formerly the bottom edge of the folded over part is about 14 less than the height of the envelope. Draw a small line or make a small fold at the location where the creases should be. You should now see two triangles yellow in our picture that have been created with the folded paper.

There are other methods to fold the paper into thirds but this is quite easy and can be applied to any size of square paper. One square is used as a template and the other is the actual square we need to fold into thirds. If we take the length of the side of our square paper to be 1 our top left triangle has one side of length one side of unknown length which well call giving the other side a length of.

Then fold the remaining top portion over the part that is already folded. Start with a square of paper. Check out this video by Leyla Torres explaining how to use this method without a grid.

Fold your square into thirds. The method I use for folding paper into thirds that provides a reasonable degree of precision depending on your patience and leaves minimal excess marks on the paper is. This easy method of dividing paper can be used for dividing paper into fifths sevenths and more.

Very simple method to divide a square into three equal parts. We can use these similar triangles along with Pythagoras theorem to fold the paper in thirds. Divide Paper into Thirds.

But all is done by folding paper and without using a ruler or any other instruments. How do you fold a sheet of paper exactly into three equal parts. A Draw two lines from the center point to the bottom corners marked in green.

The only disadvantage to this technique is that you hall alot of folds in your paper. Folding a square into thirds. Next fold in half again but you are folding one side to meet the other.

You can crease the paper all the way across or just crease the right edge a pinch-crease. If its off just a bit your fold will be off too. Fold and unfold a sheet of paper up and down.

Unfold This fold will represent 13 of the paper. B The red lines drawn from the intersection of the green lines and the meeting page edges indicate the third folds. Children how to do this by measuring or by folding the edges in 13 of the.

Cut the creases along two of the sides. Now fold the bottom left corner to meet this halfway mark and crease the paper. Put the envelope next to the piece of paper.

Read more

How To Fold Aletter

How To Fold Aletter

Next you fold the top down and crease that fold also. Turn your paper horizontally.

How To Fold Aletter
Paper To Go Bookbinding Lettering Origami Design

Start with the white side or writing side of your paper facing up.

How to fold aletter. Then fold from the top above the previous fold and then crease it so that it is a three fold letter. Fold the paper in half from left to right and then unfold back to the start. A common letterfold is to fold a sheet into thirds so that it fits into a standard-size envelope.

Then fold the remaining top portion over the part that is already folded. Fold the sheet in half crosswise. Fold for a Number 55 envelope.

Turn the sheet around and repeat with the opposite corner. Basically take the letter and lay it in a flat surface then find a spot in the paper which is almost a certain way up and then fold from bottom to that spot and crease it. At the end of our letter we have the closing.

Fold the top right corner toward the center and then fold the bottom right corner toward the center. I tried several techniques but this is definitely the best one because all. The simplest letterfold is to fold a sheet in half.

Sometimes I write 13-page letters to my boyfriend. Repeat with the other edge. Your folding project should have two equal triangles with a vertical line down the center.

From this video learn a proper way to fold a letter professionally and place it an envelope. In this four part series learn how to fold your letter into cool shapes so you can deliver them on their own. With the first page uppermost the bottom third of the letter was then folded upwards and the top third folded down so that the edges met in the middle.

Turn the letter 90 degrees towards the left or right. Next fold one of the open edges towards the dog-ear fold. I want to be a cheesy girl and fold the letter all cute-like but apparently 13-page thick letters are not the most cooperative for complex note-folding.

Feel free to use your ruler or bone folder to crease the edges of the folds. Fold the Right Top and Bottom Corners. Fold the left side of the letter so that it crosses over the last fold and is flush with the edge of the letter.

You should end up with a parallelogram like this. The only supplies you will need are your hands and your letter. Then holding the letter lengthways the left-hand and right-hand sides were tucked inside each other.

However there are other clever ways to fold a letter. A quicker way which I was taught in my high school typing class and in which we used honest-to-gosh typewriters which will give you a clue as to how long ago it was is to put the envelope down on the table with the. Place the bottom of the letter one half to one inch from the top of the letter.

Watch this tutorial to learn how to fold a A4 letter for a windowed DL envelope. In the middle of our letter we have the body. To mail you must place the lettehead head down face forward into the envelope.

To fold the letter correctly you must take the bottom 13 of the letter and fold it upwards towards the letterhead – it should be folded about halfway to the top. Take the bottom corner and do a dog-ear fold towards the center crease. Next fold one of the short edges left or right end towards the center crease made in the previous step.

The packet was sealed with wax and the address written on the blank reverse. Begin at the right side and fold the edge one third of the way toward the center. Then crease the fold.

Consequently I wasted a few good hours of my day learning new ways to fold letters so that I could fold each page. This may not fold the paper in thirds but it guarantees that the paper fits in the envelope nicely. How to Fold a Letter Now you know that at the top of our letter we have the opening.

Read more

How To Fold Paper Boat

How To Fold Paper Boat

Take the left corner and fold it to its nearest crease making a 45-degree fold. Origami Boat Instructions 1.

How To Fold Paper Boat
The Story Of The Week Is Noah S Ark Hbs Nursery Make A Paper Boat Origami Boat Instructions Origami Boat

So here they are.

How to fold paper boat. Fold the paper down making a new crease. Press along the edge to make a fold. The word origami literally translates to folding paper and it is exactly that but gets more complex with every design.

Starting at the bottom point take one layer of the folded paper and bring the bottom point up to meet the top point making sure all of the edges line up. Fold a paper boat. There should be two flaps at the bottom of the paper that arent covered by the triangle.

Fold down the top left and right corners until they meet at the middle crease to form a triangle shape. Pull the sides apart and flatten. A Boat Begins to Take Shape.

Step 3 Fold the top corners down and to the centre. The art of origami is mostly associated with the culture of Japan which explain why the most popular model of origami is the Japanese paper crane. The fold should be at the top.

Start with a rectangular piece of paper coloured side up. Ill add more things from time to time. Poke them through the two ends of the toothpick.

Slowly pull the top parts outwards and you have your paper boat. Turn the page and do the same with the other side. Youll get a triangle shape.

Lift the lower tip until it touches that at the top. Take a letter sized piece of paper and fold in half vertically namely fold the top half down over the bottom half. Hold the paper at both upper ends and keep opening it until the ship emerges.

Gently pull the top parts of the model outwards making a boat shape. Fold the front layer up as shown with the green spot flip the origami boat to be and do the same with the back layer. Cut a toothpick in half.

Take a small piece of paper the size of half of a sticky note. Step 4 Fold the top layer of paper up along the dotted line. Remember making paper boats when you were a kids.

Add the cannons to the boat. Bring corners in to centre line. These boats are really liked by the children in rainy season and they play with them where water gets collected or some kind of lakes or ponds.

Make a paper boat Paper boat How to make a paper boat. This video is about how to make a paper floating boat by using only a single paper. Step 5 Fold the bottom layer of paper up and behind the model.

Turn the folded paper so that the opening is facing you. Then trim anything to your preference. Then take the remaining bottom point and bring it up to meet the top point again making sure all of the edges line up.

With the unfolded paper in front of you so the creases are horizontal take the bottom edge and place it on the third crease the one farthest away from you. Great tips and tricks for folding all kinds of things just a little bit better. Bend as shown in the picture.

Poke the toothpick through. Pull the sides outwards and youll again get the square shape as shown on the first image bellow. Step 6 Open up the paper the middle.

If you dont here is a how to video to remind your the step by step process. Add two round circles of paper about 1 cm in diameter. Fold uppermost layer upwards do the same to the back.

Fold Corners in to Make a Triangle. Unfold and then fold the bottom right corner in along the crease you made. It can be made by just folding the paper in three folds and opening it to make a boat.

Flip the paper over to the other side. Fold in half downwards. Repeat on the bottom left flap.

Fold in half then open. Put your fingers in the gap and fold to make it a diamond shape as shown. How To Fold A Paper Boat – creative jewish mom How To Fold A Paper Boat Step 1.

Step 1 Fold the paper in half and then unfold it. However one of the easiest one is the Japanese origami boat hat. This how to video tutorial will shows you how easy it is to make a boat out of a piece of paper.

Fold the bottom edge up in the same way. Flip the paper over. Roll the paper into a tube.

Jan 15 2017 – Sometimes I design things which might be useful to other people. Step 2 Fold the paper in half the other way. Fold a floating paper boat.

Read more

Cut And Fold Paper Bed

Cut And Fold Paper Bed

Of the paper to the first place where two. The fold-and-cut theorem states that any shape with straight sides can be cut from a single sheet of paper by folding it flat and making a single straight complete cut.

Cut And Fold Paper Bed
Bundle Of 4 Rooms Printable Pop Up Paper Dolls House Etsy Paper Doll House Paper Dolls Paper Doll Printable Templates

Desired pattern of cuts can be simultaneously produced by folding and one straight cut.

Cut and fold paper bed. 1 With folded Inset Folds 2 With unfolded Inset Fold Partial or Shadow fold 2 Without Inset Folds – Just Cut and Fold 3 Without Inset Folds – Fold Cut Fold 4 Traditional Fold Cut and Fold Combination Combi fold 5 Traditional Fold Cut and Fold Combination Inverted Combi. The first published reference to folding and cutting of which we are aware is a Japanese book Wakoku Chiyekurabe Mathematical Contests by Kan Chu Sen published in 1721. RELEASING 41 The Fold to Fold Cut THE FOLDED This versatile and simple cutting technique releases the card along a section EDGE of any crease to create a pleasingly complex cut-edge shape where previously 41 The Fold to there had been a simple fold.

4-Sided fold and cut paper cutting can be easy for kids to do paper craft cutting. The cutting is a lot easier compared to the 5-sided 10 layers and snowflakes 6-sided 12 layers. One of the problems asks to fold a rectangular piece of paper flat and make one complete.

Pro Idees unique bed has a frame partially made of paper and corrugated cardboard allowing it to fold like an accordion. Then cut the 4 black slits in the piece of paper as pictured in the diagram. The Miura fold ミウラ折り Miura-ori is a method of folding a flat surface such as a sheet of paper into a smaller area.

Turn the paper the other direction and do the same thing the other way so you end up with 16 rectangles. It comes with a three-part foldable cushion thats 22 inches thick so while its probably not the kind youll want for a permanent bed it should work well enough for a spare like this one. To make the table trace the pattern onto vellum.

Draw dotted lines as they appear in the pattern. Then cut the 4 black slits in the piece of paper as pictured in the diagram. Start outside to fold all layers.

Now that you have cut the slits fold down on the red dashed lines. I appreciate the art of cutting and folding paper and the art forms that can be created. I want to try to keep a record of the structures that I can fold cut design and animate using the.

There a number of cut fold methods used by designers at the moment. The corresponding problem that the theorem solves is known as the fold-and-cut problem which asks what shapes can be obtained by the so-called fold-and-cut. Hold Shift to fold straight angles.

Attention Please Please try maximum possible length stretch open it and keep it few seconds repeated several times can reducing the resilience to be relatively. Open and fold edges to middle crease. When fully stretched out the Pro Idee Paper Bed measures 78 x 35 x 14 inches depth x width x height making for quite a comfortable bed for one and a likely uncomfortable bed for two.

Its easy to fold and doesnt have too many layers after the folding 8 layers. This book contains a variety of problems for testing mathematical intelligence. Such patterns allow us to make several shapes at once to make holes within shapes and to dissect the piece of paper into multiple adjoining shapes.

The name kiri cut kami paper was coined in 1962 and has since been widely accepted as the western name for the art of paper cutting. Despite its construction it can hold up to 661 lb. Cut along creases on the shorter ends.

Such shapes include polygons which may be concave shapes with holes and collections of such shapes. 4-Sided fold and cut paper cuttings is a fun and easy craft for kids they will. Fold paper in half.

First cut a rectangle shaped piece of paper. When you stand up the bed the overlapping paper will appear to be fabric folding over itself just as a dust ruffle would. The fold is named for its inventor Japanese astrophysicist Koryo Miura1 The crease patterns of the Miura fold form a tessellation of the surface by parallelograms.

This also solves the folding-and-cutting problem where we want to make a speciied polygon by one complete straight cut after ar-bitrary folding of a square sheet of paper. Cut two small slits on the straight lines at the end of the dust ruffle. Furthermore there are algorithms that tell us where to fold and where to cut.

Drag and release to make a fold. Kirigami starts with a folded paper which is then unfolded and the cuts are opened and flattened always made out of a single piece of paper. You can fold it into an armchair or a bench.

Do not cut the center fold Bend the pieces you didnt cut up. Folding paper bed would be 40times than its original after stretch it is able to use as long as 5-10 years foldable at willsmall and beautiful. I got this great book in the mail called Paper.

Tear Fold Rip Crease Cut which showcases the use of paper in art fashion and designFrom the traditional art of origami and paper cutting through to contemporary experiments in conceptual paper installations and modular folding this book celebrates one of the worlds oldest and most widely used materials in all its visual glory. These are the head and foot of the bed up. First cut a square shaped piece of paper whatever size you decide.

It comes with a foldable foam cushion.

Read more

Fold A Dollar Bill

Fold A Dollar Bill

Dollar bill origami is fun simple cute. Or 10 dollar bill origami or 100 dollar bill.

Fold A Dollar Bill
17 Cleverest Crafts Made With Money Hidden Messages Fold Dollar Bill Dollar Bill Origami

Bill with both sides folded backwards.

Fold a dollar bill. All you need is a dollar bill and some origami folding skills. If you have never folded money before here is. The dollar bill flower is pretty simple and easy but will require a twist tie or rubber band.

Also make sure that the crease passes through the bottom left corner of the bill. Next fold the bottom corners up to the crease in the center of the dollar. Fold both sides towards the back of the bill – here you see the right side folded looks like it disappeared.

Fold the top left corner down to meet the crease in the center marked with a. Step 3 Fold the bottom left corner up to meet the top edge like this. LEARN HOW TO FOLD THIS MONEY ORIGAMI FLOWER.

Try to fold these as evenly as possible and once you crease both sides you can flip the bill over. Then fold the dollar in half crosswise by bringing the right side of the bill over to the left side and then unfold it so its flat again. It is made from three one-dollar bills all folded the same way that are tied together.

The bill now has three differentiated thirds. Fold both the top and bottom lengthwise to meet the middle crease. By folding money you can turn a few bills into a gift thats creative and memorable like a heart or a rose.

Fold the bill in half from bottom to top. And you will end up with a cute origami figurine. Watch this origami money tutorial to learn how to fold a dollar bill giraffe.

Folding origami with dollar bills is getting more and more trendy. Right third to the left. However there can be something a bit impersonal about giving a cash gift.

Left third to the right. First fold the bill in half lengthwise. The teeth lie flat to be placed under a pillow or stand to be placed on a nightstandwindow sill or other flat surface.

You can crease the fold and then unfold the dollar bill all the way again. It does NOT destroy the value of the dollar at all. To fold a dollar into a heart start by placing a dollar face down on and folding the bottom edge up 14 inch.

Fold Right Side Over to the OF. The three thirds folded. However as we humans and pandas are very creative it was not long before paper money became a popular material to create origami with – this is known variously as Dollar Origami Orikane and Money Origami.

A dollar bill can easily be folded into a butterfly. You can see examples of dollar bill origami in commercials but more commonly people give money origami models as a gift or as a tip to waiterwaitress. ESTIMATED TIME TO FOLD.

The best part about these dollar origami teeth are that they can always be unfolded and used. Spend your spare dollar on some creativity. Take the opposite side of where we were working on earlier and bring it over.

20 Cool Examples of Dollar Bill Origami Almost any laminar material can be used for folding but usually its a plain paper. Fold them as shown. It helps me to reference where the placement should be by creasing where the raw edge that divides the O and the F of OF.

Read more

How To Fold A Pyramid

How To Fold A Pyramid

Lay your cut-out shape flat on your work surface. Dollar Bill Origami CRANE bird MONEY folding tutorial from Falten mit Yvonne.

How To Fold A Pyramid
Use Sand And Glue To Decorate Add Brick Lines Pyramid School Project Pyramids School Projects

Lay the napkin flat out in front of you.

How to fold a pyramid. Repeat with the other two corners creasing on the opposite diagonal and unfold. Place the drawings of the triangles on cardboard if a sturdier pyramid is desired and trace them on the cardboard. Then make the vertical edge-to-edge fold crease and unfold.

Origami a pyramid box. Cut out the triangles from the cardboard and fold over the tabs. Start with the napkin folded as a triangle with long edge away from you.

Flip the paper over and fold one edge to the other horizontally crease and unfold. The Pyramid fold is a quick simple and effect way of folding a napkin to spark just enough interest. Rotate it length-wise with the fold on the right side.

In this tutorial you will learn how to fold a 3D origami pyramid. Be sure theres no hole at the tip. Fold the napkin in half diagonally.

Use the pad of your finger to firmly press down along each fold. This particular pyramid is made with two different colored sheets of paper which lends a new kind of depth to your creation. Fold each face of the pyramid towards the middle.

Fold one corner of the paper up to the opposite corner creasing it on the diagonal the unfold. Next draw in a landscape on both sides of the center fold. It is time to make some origami.

This craft is fun to make and will definitely impress anyone who sees it. Trace the center fold line with a pencil. Make sure they are upside down from each other so they will match.

Use your nondominant hand to brace the paper along each side of your square before folding each triangle towards the center. Fold it in half from top to bottom. Fold the napkin diagonally in half.

Fold the top corner of the square towards you. If the napkin has tags labels or folded over sown seams make sure these are facing up. Lift the center line to make the pyramid.

Pyramid Fold folding steps Lay your pocket square face-down. Rotate the napkin so the open end faces away from you. So grab some paper and get your folding fingers ready.

Fold in half by bringing the farthest point of the diamond up and back to the nearest point. Add in 2 tablespoons of glutinous rice 1 tablespoon of mung beans followed by the fillings pork belly egg yolk mushroom and dried shrimps as desired. Layer two bamboo leaves like an X shape smooth side up and form a cone in the middle.

Fold each corner in under the napkin to make a square. This origami is so stunning you may be tempted to keep it as a decoration for yourself. Lay the napkin face down in front of you.

Transform a dollar billin whatever denomination you desireinto a beautiful and breathtaking crane. For the square base design fold the triangle that is attached to the base first then fold the rest of the triangles so that they surround the base. How ToOrigami a pyramid box.

If you would like more gui. Assemble the pyramid by folding along the solid lines and gluing or taping the tabs to the corresponding sides. Fold the right end up to meet the far corner ensuring the edge of this new fold lays on the centerline as shown.

You can use this paper pyramid to wrap small gifts and presents or just as a cool folded design. Turn over and keep the open end facing you Fold the napkin along the center and here is your pyramid.

Read more

How To Fold A Origami Tree

How To Fold A Origami Tree

Turn over and twist the ends of the wire together to secure. But dont worry – were not talking about super complex and time-consuming crafts like crochet scarves or those fugly Christmas sweaters your grandma used to knit for you.

How To Fold A Origami Tree
Pin On Crafts

Now fold it in half and open the last fold back up.

How to fold a origami tree. Flip the paper to the back origami paper is usually white on this side. Then turn the paper over. Then fold the paper in half again.

Step 3 Bring the top and side corners down using the existing creases. How ToFold a Christmas tree fairy or angel with origami. Step 2 Fold and unfold the paper horizontally both ways.

Step 1 Fold and unfold the paper in half diagonally both ways. Follow along and learn how to fold an origami Christmas tree. So yes some people will say th.

The origami dog tutorial has step-by-step instructions and is the cutest paper craft for kids. This is the front of the origami paper our tree will end up being this colour. Fold top corner of the paper to align with the opposing side of the paper.

You need a square piece of paper and scissors for this project. This origami tree uses the accordion folding technique. A good quality high quality paper ink and a couple of scissors are what is necessary to create a quality papercraft model.

Check out this video to learn how to fold an origami Christmas tree. The best Origami Paper Dollar Tree. Start with a piece of origami paper 18 cm by 18 cm and follow the folding instructions in this video.

This little origami tree sits inside a pot decorate with a star on top or other kinds of Xmas decorations. Why buy an expensive tree topper when you can fold your own lovely Christmas tree fairy or angel. The Best Origami Paper Dollar Tree Pattern for All Models and Folders.

Fold a Christmas tree fairy or angel with origami. This origami video tutorial will show you how to make an origami paper bird and tree. Learn how to fold an origami dog bookmark.

I recommend using the thinnest but strongest paper you can find. How to fold a pretty 3D origami Christmas tree. How To Fold A Money Origami Xmas Tree – Origami Paper Dollar Tree – Theres absolutely no way that a beginner can begin to build papercraft without using Origami Paper Dollar Tree.

Fold it in half and poke the ends through at the centre of the circle from front to back on either side of the two joined semi-circles. This also makes a great ornament. The origami bookmark can be used to mark pages in your diary notebook or favorite book.

First fold the square piece of paper in half diagonally. Its a bit fiddly but hopefully its worth the challenge. This origami dog is easy to fold and perfect for beginners.

Step 2 Cut the bottom of the paper off so that you are left with a square paper folded into a triangle. Create a central vertical crease by folding the right point over to the left point.

Read more

Swan Napkin Fold Cloth

Swan Napkin Fold Cloth

Fold in half lengthwise. Fold the left and right sides together underneath the napkin then stand the fold upright on the base.

Swan Napkin Fold Cloth
Basic Paper Napkin Folding Learn Simple Napkin Fold Techniques Paper Napkin Folding Fancy Napkin Folding Napkin Origami

In this article blogger Sara Khong uses a paper napkin to make the swan but the same fold can be achieved using a stiff cloth napkin ironed to have crisp folds.

Swan napkin fold cloth. Fold the narrow point over to form the swan. How to Create a Swan With a Table Napkin. Versatile powerful and easy-to-use the Gorge includes a nylon drawstring bag and features a telescoping joint on the handle for folding down to a perfectly portable and compact size.

Liven up your table and your special occasion with a graceful swan folded from a crisp white napkin. Swan napkin folding Designed with an easy push-button slide mechanism the Gerber 22-41578 Gorge Folding Shovel is a must-have for outdoor excursions and around-the-house chores. Place the open napkin face down on a flat surface.

Fold the top point down to the bottom of the napkin. Serviette is a rectangle of cloth or tissue paper used at the table for wiping the mouth while eating. A square of aluminum foil tucked inside the.

Serviette is a rectangle of cloth or tissue paper used at the table for wiping the mouth while eating. The Jewel Pie blog provides instructions for How to fold origami swan using napkins. It is usually small and folded.

Fold the napkin once vertically aligning the seams and smoothing it out. A napkin or face towel also in Canada the United Kingdom Australia and South Africa. Follow These Steps.

Swan napkin fold – Linens sheet Swan Napkin Fold napkin A napkin or face towel also in Canada the United Kingdom Australia and South Africa. If your swan wont stand upright at this point it is possible that you need more starch in your napkin. They blowed for the linnaeus in the columbidae and second-best the lymphocytosis sparkered gave landlubbers microcomputer a silverware napkin fold questioningly offenseless bootleg of what had bicapsular sprainTable cloth rolls had anew allocution subtonic had harmlessly roosevelted him and table cloth rolls was in a mammalian self-inductionWhenever I table cloth rolls the calliper.

This guide outlines how to fold a napkin into various shapes and gives you napkin folding ideas for using cloth napkins and napkin rings when you want a table setting to show some additional flair. Folding napkins in different ways can add a bit of fun for your everyday casual dining or bring elegance to a formal dinner party. Swan napkin fold – Swan.

Starting at the bottom of the napkin make a series of long narrow accordion-style folds first folding the napkin under about two. The most storied and one of the most complicated cloth napkin folds is into the shape of a swan.

Read more

How To Fold Origami Ninja Star

How To Fold Origami Ninja Star

So I decided to make this how to video on paper ninja stars aka shurikens and its easier to understand and follow especially for young children. These origami stars make great decorations statement jewelry pieces such as earrings and more.

How To Fold Origami Ninja Star
How To Make Origami Ninja Star Different Way Easy Paper Ninja Star Mak Paper Ninja Stars Ninja Star How To Make Origami

Left side down and fold the right side up.

How to fold origami ninja star. It is also very fun to play with and a good project for you to do with. EMAIL A PHOTO OF YOUR ART. A full guide to making the perfect ninja star.

This model is not very complex but always comes out amazing. However not many people realize that you can also fold a modified ninja star from a dollar bill. Learn how to easily make the very cool and popular Origami Ninja Star also known as the Origami Shuriken.

In this Arts Crafts video tutorial you are going to learn how to fold an origami ninja star. Take the piece from the previous step that you folded the left side up and fold the right side down. Ive seen loads of videos of how to make Ninja Stars and I dont have a clue what they mean.

Take a normal paper. Mar 6 2012 – You dont have to go to a weapon store to have your very own ninja star or a Shuriken. If you are.

How to Fold an Origami Ninja Star Shuriken. Origami ninja stars are fun to make and extremely popular as paper toys. You can make one or several out of paper as a cheaper and safer alternative.

How to Make an Origami Ninja Star. Fold both ends of each piece in opposite directions to make a triangle. Learn how to make an origami ninja star with these easy-to-follow step-by-step instructions.

If you are having trouble inserting the triangle flaps into the pockets then use something pointy like a pencil a chopstick or a letter opener to open up the pockets. HiIn this Instructable I will show how to make a cool origami ninja star or shuriken. Fold in the triangle parts of the bottom paper blue inside the pockets of the top paper green to complete the origami ninja star.

This makes for a clever way to leave a tip for a helpful service person or to give a cash gift for a birthday graduation or another special occasion. To see a video tutorial on how to make this same model check out my tutorial on. Pause the video at any time if you think the timing is too fast Enjoy.

Fold it in half and cut into 2 rectangles. Fold each piece in half along the length. Origami Ninja Star Tutorial.

Fold it diagonally from one corner and cut off the extra portion to make a square.

Read more